
Home improvement is one of those easier said than done things or projects, because of its hands-on sometimes dreary nature. The picture of glowing, clean, neat and aesthetically appealing outcome is a far cry from the sweating, arduous DIY’s that one has to go through, not to mention the dent on your purse while you are at it.
It, therefore, follows that gardening, particularly sprucing up the outdoors with lighting is not a get-up and go task; at least not every day and maybe not for everyone.
The following guide on solar garden lights is here to provide some encouragement and perhaps some saving grace through easy to execute tasks to help you brighten up your outdoors.
Here are some 19 tips to help you decide faster and get started sooner.
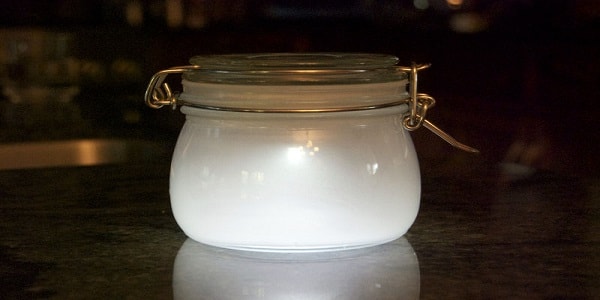
#1. Mason Jar Garden Light
For this type of lighting, you will need a mason jar like the one below.
The main steps to achieve the finished product shown below are frosting the lamp on the inside to achieve a warm glow and lighting.
This will be followed by placing the solar unit inside the jar.
The below easy to follow guide illustrates how:
Step 1: Sealing the jar
Seal the top of the jar using old newspaper to ensure a clean frosting
Step 2: Frosting the mason jar on the inside:
Frost the jar to give a nice glow.
Step 3: Taking the solar light apart.
The solar light will come in one piece upon purchase. That is, one is the tube and the other piece is the solar unit which contains batteries and the solar film.
You will need to unscrew the solar unit and connect it to the jar.
Step 4: Securing the solar unit
To ensure the unit is stable within the jar, apply adhesive around the edge.
Proceed to test your brand-new Mason jar lamp and voila! You are good to go!
Click Here For the full tutorial.
#2. Repurposed Accent Light
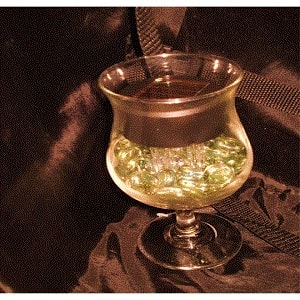
This type is quite similar to the Mason jar. It is basically a glass vessel, except that it contains glass rocks and could be more ornamental. Just connect the stem portion of the solar path light to the jar and enjoy some beautiful lights. Follow the link for more information.
#3. Mason Jar Chandelier
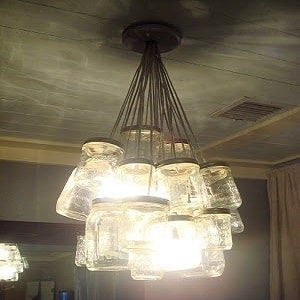
This type is more similar to the first one, only now it is a collection of several mason jars forming a chandelier.
This type of lighting also works indoors. For a detailed guide, follow this link.
#4. Repurposed Mason Jar Luminaries
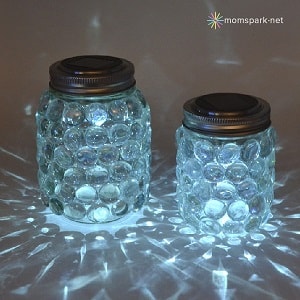
The ever-versatile Mason jar gets more appealing and useful with this eye-catching version. Simply glue some glass beads to the side of the Mason jar and use battery operated tea lights. It looks absolutely glamorous when setting on the patio.
The step by step guide is available here.
#5. Bottled Tree Art
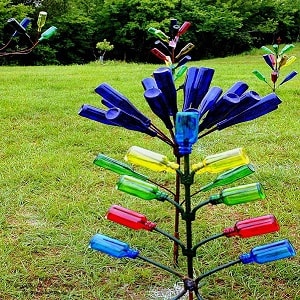
This type of outdoor lighting doubles up as recycling and environmental conservation. Next time you want to toss out your bottles, think of giving them a new lease of life in your garden. All you need is some bottles- the more colorful the better- and a base; wooden or metallic, with bases to insert the bottle.
Click here to see more of it.
#6. Clay Pots Lighting
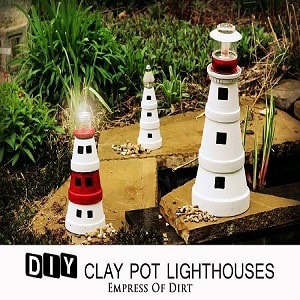
For a closer connection to the earth, clay pots or vessels can make beautiful garden lights. All you need to do is to paint the clay pots or vessels and assemble the solar lights. Place them where they illuminate best and enjoy!
Click here for detailed instructions.
#7. Fairy Light Chandelier
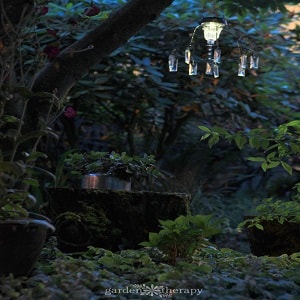
The good old chandelier cannot be left out among the garden lighting methods. In case it was gathering dust in the attic, it is time to dust it up and upcycle. Give it a new coat of paint and replace the candle holders with stakes from the solar path lights. The finished garden lamp will simply glow (or blow) you away.
Read the full post here.
#8. Candle Holder Center Piece
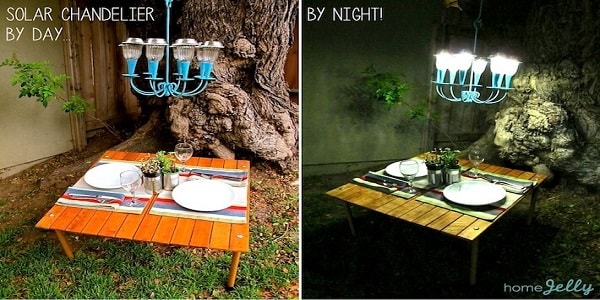
This DIY project could not get any easier; Even glass candle holder with solar light wired inside adds to your garden lighting options.
This post explains how to make this awesome solar light chandelier.
#9. Hanging Firefly Glass Lanterns
- Cut a square of muslin big enough to cover the lid and overhang jar. Between 10 and 15 square centimeters should do the job.
- Place the muslin over the top of the lid and anchor the piece by fixing it with a piece of double-sided tape.
- Switch the battery on –operated tea light and put it inside the glass.
- Screw on the lid so that the cloth hangs down, covering the jar.
Click here to see more of it.
#10. Solar Light Flower Stand
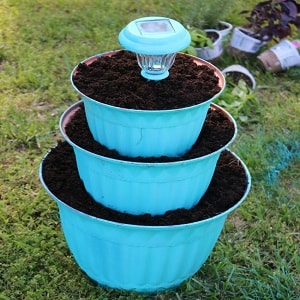
Your flower pots never looked so bright with a solar lamp right on top- like the centerpiece of an artistic piece. Just stack your plant pots, plant your desired flowers or herbs and place the solar glass lamp on top as shown above. If you wish, you can use one flower pot with the lamp at the center. Whatever you choose, the combination of plants is a sure winner. Learn more here.
#11. Tin Can Lamp

Once again, when it comes to going green, those tin cans you have been discarding now have a new use! How about sprucing them up with some paint, drill up some decorative holes on the side and connect the solar lamp. You can hang this up on trees, poles or hooks on the walls. You will absolutely beam with joy from this rustic garden lighting theme. See the full guide here.
#12. Glowing Outdoor Orbs

This is one of those methods that gives a high-end look but it’s really clever upcycling. Get hold of those mini lights, stack them inside some glass shades. Attach an extension cord and you are all set. Click here for more information.
#13. Mason Jar Luminaries
All you need to set this garden lighting up is a mason jar, glass beads, and a solar light. Place it on your garden table or furniture and enjoy some bottle lit dinner.
#14. Upcycled Solar Lamp
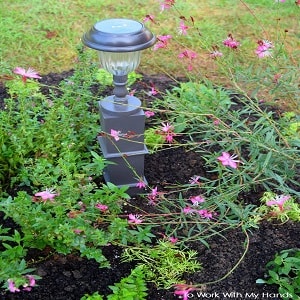
For this type of garden lighting, simply revamp your lamp by incorporating the solar lamp, sealing it and light up! Brand as new.
#15. Teapot Spilling Lights
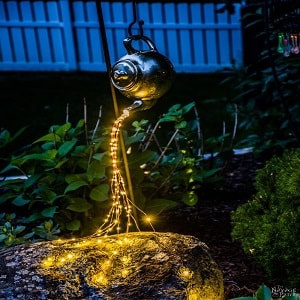
If you want your garden to grow up, you might look for old teapots at the thrift store, combined with solar strings and convert them to these beautiful masterpieces.
For more information and pictures of this magical solar light teapot, follow this link.
#16. Twigs Lamp Shade
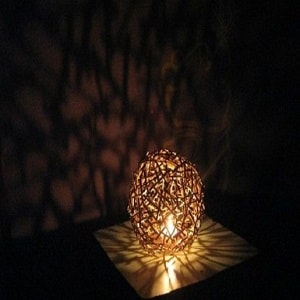
This lamp requires a balloon, twigs, glue and of course your solar light or battery-operated candles.
- Blow up the balloon and stick the twigs on.
- Once the glue dries up, burst the balloon and clean out any remains.
- Spray the twigs with your desired color, then insert your solar lamp.
This lamp is ready to shine!
#17. Solar Address Sign
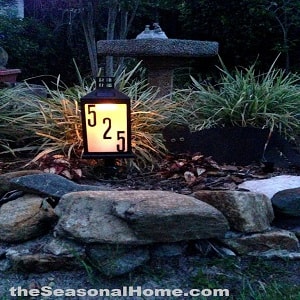
Your address sign can add to your lawn’s glamour with a little touch.
Simply line the inside of the lantern with opaque white shelf liner, insert the solar bulb and your house number. It serves as a charming invitation to your house.
Follow this link for a step by step guide.
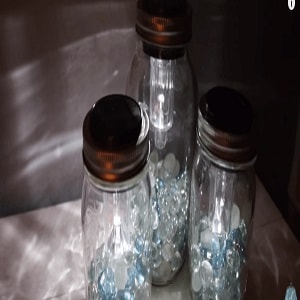
#18. Sun Glass Jars
To make these shiny glass jars is not as difficult as you think.
All you need is to have solar mason jar lids and glue them to the inside of a glass jar and then expose them to the sun. If you want to add colors or patterns, add 9 drops of food coloring and 1 teaspoon water to every tablespoon of Mod Podge. After that, mix and coat the inside of each jar.
Heat them at 200 Fahrenheit for 1 hour.
For more information and pictures follow this link.
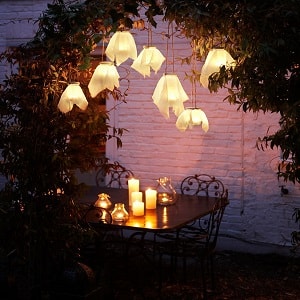
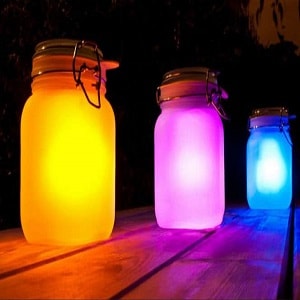
#19. Hanging Colored Solar Garden Lights

Once again, here is another simple and easy way of making Hanging Colored Solar Garden Lights.
First, you need to have a box of wide mouth Mason jars and pour an about one-quarter cup of Mod Podge onto a plastic plate and add 5 to 7 drops of McCormick’s food coloring and mix together with a paintbrush until it is completely blended.
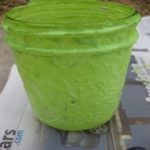
- Paint the jar and leave it for a minute or two. Use a paper towel to crumple it up.
- Put it into the Mod Podge mixture and paint the jar until you get the anticipated look.
Initially, it’ll look like Photo #1 - Leave them to dry until it looks like Photo #2
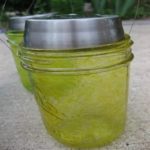
- Now, add some solar lights (Photo #3)
- Take the post off and leave just the solar top and light (Photo #4)
- Place it on top of the jars and make sure it fits perfectly (Photo #5)
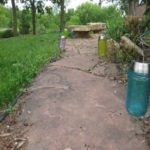
- Wrap the wire around the upper of the jar to hang them from a hook (Photo #6)
- Lastly, hang them on a hook (Photo #7)
1

2

3

4

5
6
7
Finally, you have managed to make your own hanging colored solar garden lights.
MATERIALS-
12 carton of wide mouth jars, 12 solar lights at $2 each, Wire, Mod podge, Food coloring, 12 plant rods at $0.74 each.