
Solar inverter faults usually announce themselves with a code, a blinking LED, a beeping alarm, or a dead display. Those signals are useful, but they are not diagnosis by themselves, because different brands map the same electrical problem to different warnings.[1][2][4]
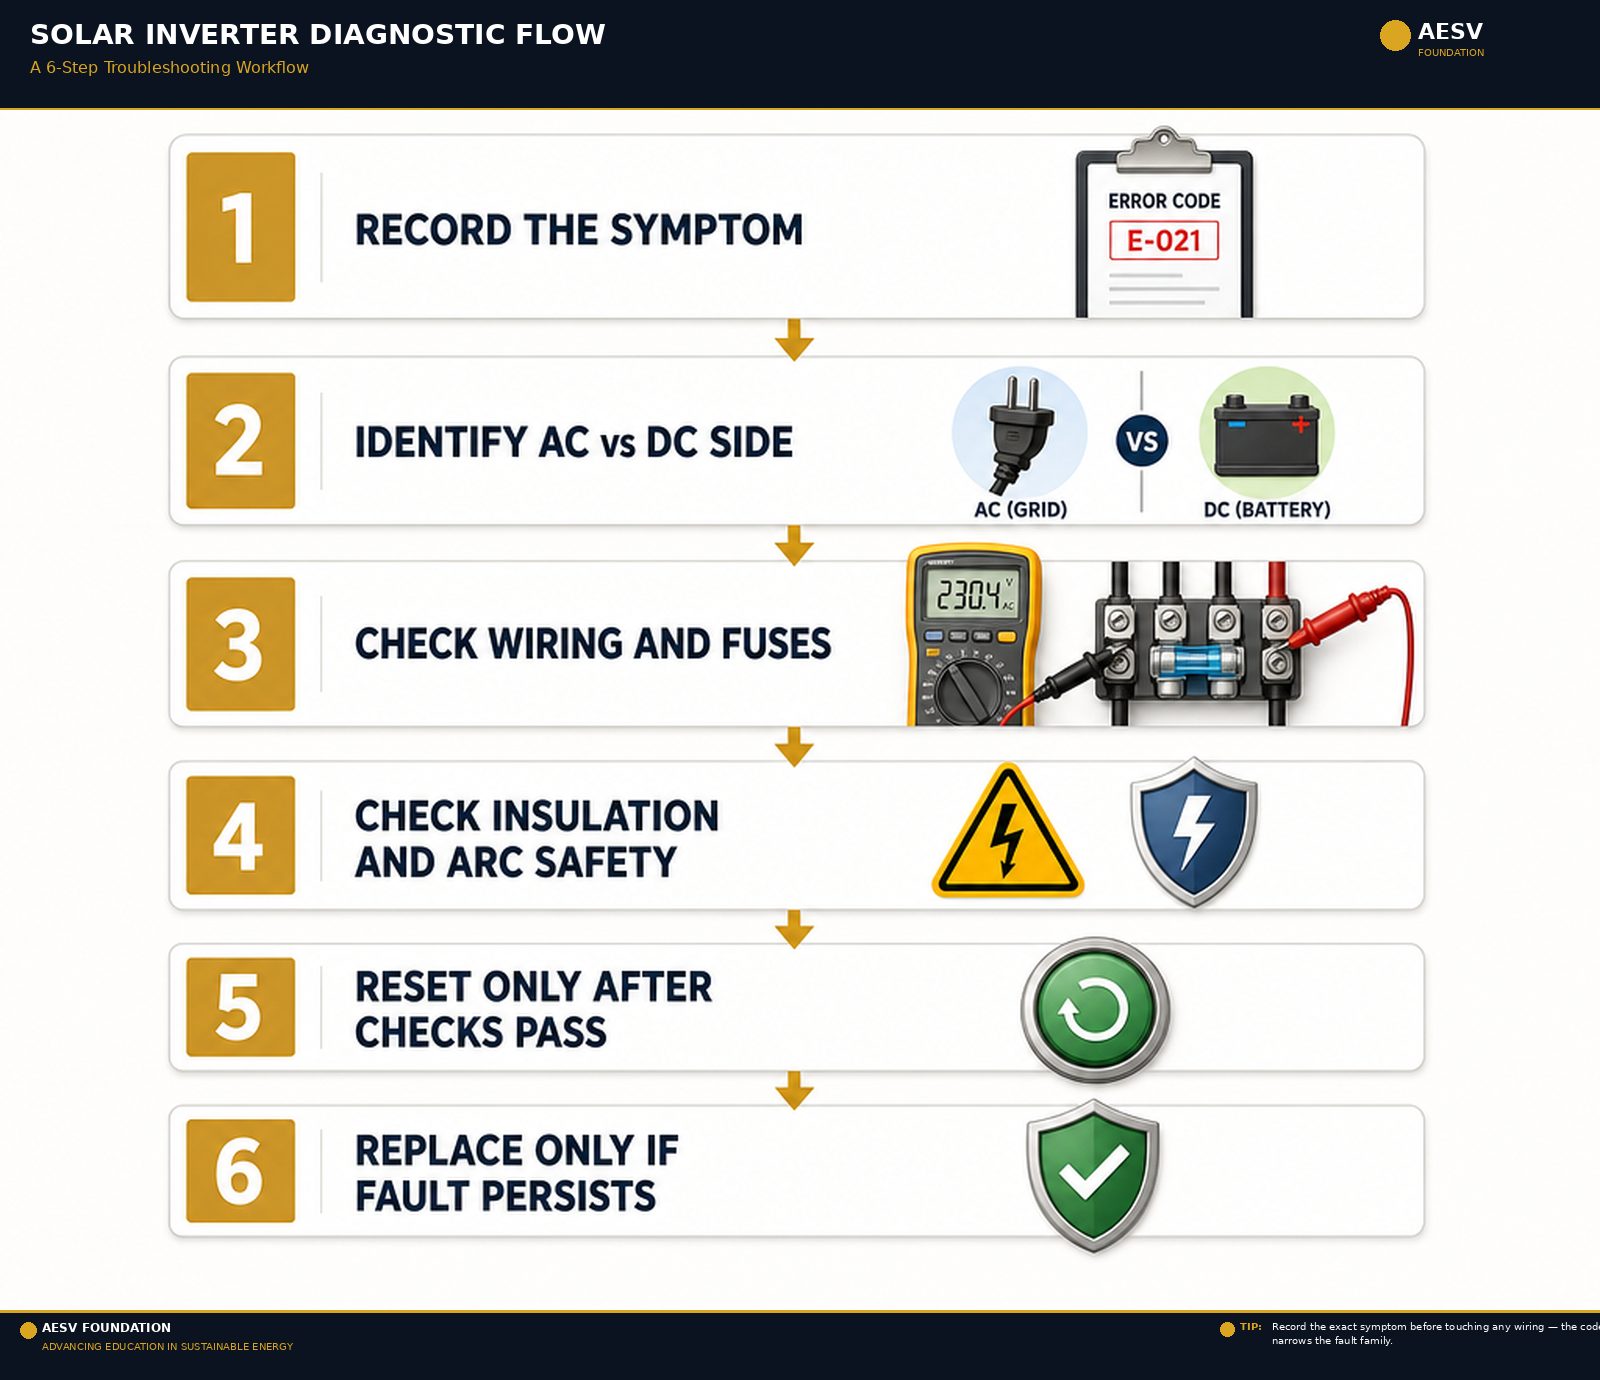
The safest way to troubleshoot is to record the exact symptom, separate AC-side problems from DC-side problems, and only reset the inverter after you have checked the wiring, insulation, and battery or grid inputs.[1][3][4]
Safety first: if you see a ground-fault warning, an arc-fault warning, melted insulation, or a hot/burned connector, disconnect the system and stop treating the problem as a simple reset issue. SMA warns that a ground fault can leave parts of the system live, and Fronius notes that arc detection shuts the inverter down and requires a manual reset before feed-in can resume.[3][4]
What inverter error codes usually mean
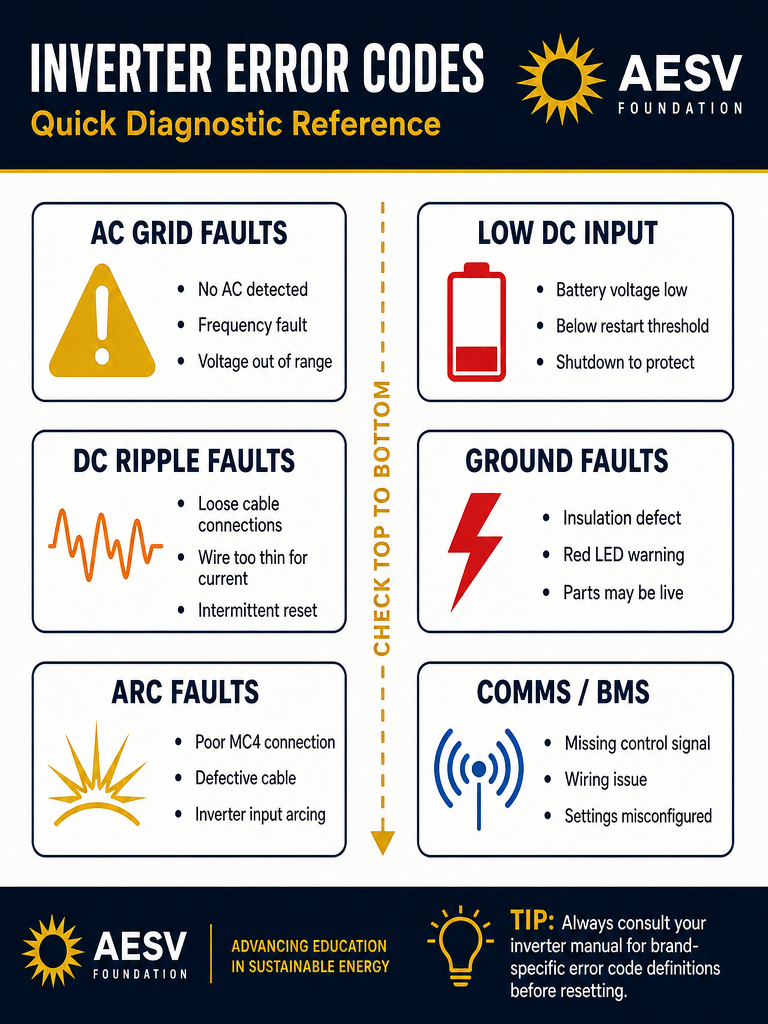
A code normally points to one of six fault families: no AC grid or bad AC frequency, DC input too low, excessive DC ripple or loose cabling, ground or insulation faults, arc faults, or communication and control failures.[1][3][4]
Victron’s inverter/charger documentation shows how wide the fault range can be, with examples such as battery voltage too low, battery high ripple voltage, battery low temperature, BMS connection lost, and network misconfiguration.[1]
Fronius lists AC-side status codes such as AC voltage too high, AC voltage too low, AC frequency too high, AC frequency too low, and no AC grid detected, which is why a dead or idle inverter is not automatically a failed inverter.[4]
Quick diagnostic flow
- Record the symptom. Write down the exact code, LED color, alarm pattern, app message, and whether the unit is completely off or still communicating.[1][2][4]
- Identify the side of the fault. If the inverter is grid-tied, confirm whether the issue is AC supply or grid quality; if it is an inverter/charger, confirm whether the battery or DC bus is the limiting side.[1][4]
- Check the wiring path. Look for loose terminals, undersized cables, bad lugs, blown fuses, or any connector that feels warm under normal load.[1][3][4]
- Check insulation and arc risk. If the fault suggests a ground or serial-arc problem, treat it as a safety issue, not a convenience issue.[3][4]
- Reset only after the checks above pass. Some faults clear when the underlying condition clears; others require a manual reset after the root cause is fixed.[1][4]
- Replace only if the same fault keeps returning. If the inverter still fails with confirmed inputs and clean wiring, the hardware itself may be damaged.[1][4]
Common symptom-to-cause table
| What you see | What it often means | First check | What not to do |
|---|---|---|---|
| No AC grid detected / AC frequency fault | The inverter is waiting for acceptable grid voltage or frequency, or the AC breaker/disconnect path is open.[4] | Utility service, AC breaker, disconnect switch, and wiring continuity.[4] | Do not replace the inverter before confirming the grid side is actually present.[4] |
| Battery voltage too low / inverter shuts down | The DC input has fallen below the restart threshold, so the unit shuts down to protect itself.[1] | Battery bank voltage, charge state, and whether a load is pulling the bank below the shutdown point.[1] | Do not keep cycling the unit without recharging the bank or removing the load.[1] |
| Battery high ripple voltage / intermittent reset | Loose DC cable connections or wire that is too thin for the current path.[1] | Lug tightness, cable gauge, terminal heating, and any sign of voltage drop across the DC run.[1] | Do not assume the control board is bad before checking the DC cable path.[1] |
| Ground fault / insulation fault / red LED | PV insulation to ground is defective or insufficient, and parts of the system may still be live.[3] | Inspect for damaged insulation, water ingress, damaged module wiring, and the fault code or red LED pattern.[3] | Do not keep probing live parts or keep restarting the inverter before isolating the fault.[3] |
| Arc fault / serial arc | A poorly connected plug, defective cable, or incorrect inverter input termination is arcing under load.[4] | MC4/connectors, input terminals, cable damage, and any state code that appeared before shutdown.[4] | Do not bypass the shutdown and feed-in lockout until the arc source is found and corrected.[4] |
| BMS or communication warning | The inverter/charger is expecting a control message that is missing or misconfigured.[1] | Battery management wiring, communication cable seating, and control settings.[1] | Do not assume the power stage is bad when the control link is the likely failure.[1] |
Brand examples that help narrow the fault
Victron’s error list is a good reminder that inverter/charger issues can come from the battery side, the DC wiring, the temperature sensor, the BMS link, or the network configuration, so the code alone is never the full diagnosis.[1]
SMA’s troubleshooting pages show that a ground fault can be signaled by a beeping inverter, a red LED, and event numbers 3501, 3601, or 3701, and the same page warns that the PV system insulation to ground is defective or insufficient.[3]
Fronius shows the AC side just as clearly: event codes 102, 103, 105, 106, 107, 108, and 112 can point to grid voltage, grid frequency, missing AC grid, stand-alone operation, or RCMU issues.[4]
Reset, then verify
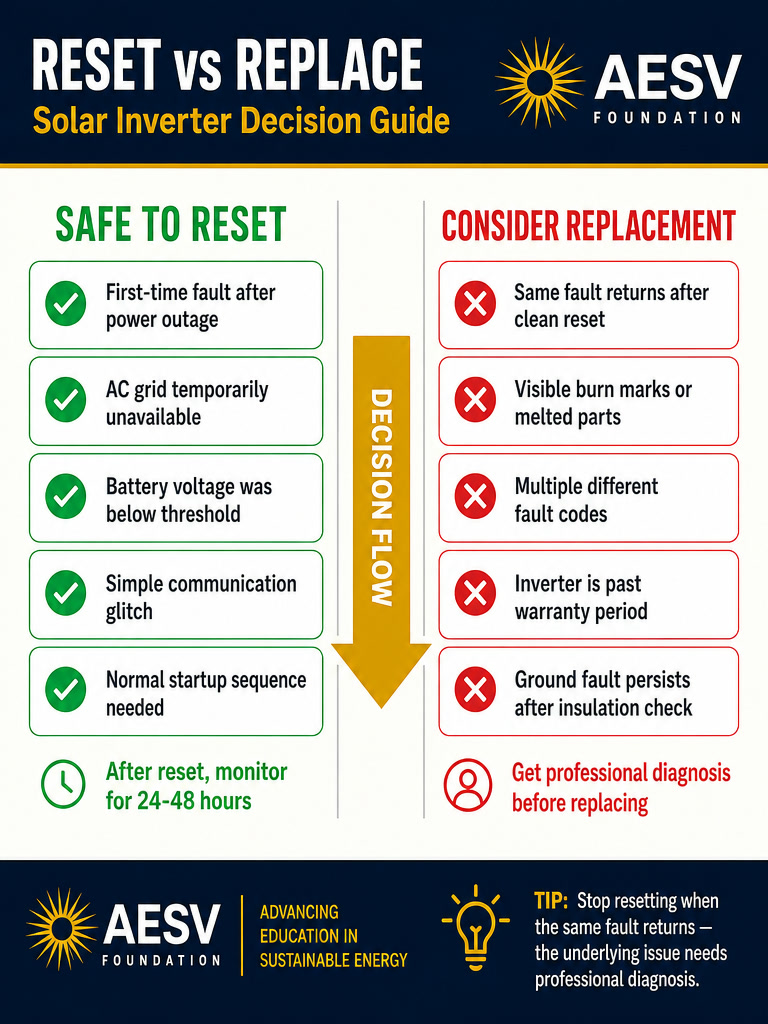
A reset is only useful after the cause has been removed, because a good inverter can still re-fault immediately if the same external condition is still present.[1][4]
If the inverter resumes normally after the reset and stays stable under load, the problem was probably an input condition, not a failed inverter.[1][4]
If the fault returns with confirmed AC input, confirmed DC input, clean wiring, and no insulation or arc issue, replacement becomes a reasonable next step.[1][3][4]
FAQ
Why is my solar inverter on but not producing power?[1][4]
It may be waiting for acceptable AC grid conditions, a healthy DC input, or a valid battery/BMS signal, depending on the design.[1][4]
Does a red light always mean the inverter is dead?[3][4]
No. SMA and Fronius both show that a red LED can indicate a fault state, including ground fault or AC-grid problems, not necessarily a failed inverter.[3][4]
When should I stop resetting the inverter?[1][3][4]
Stop when the same fault comes back after a clean reset, because the underlying AC, DC, grounding, or communication issue is still present.[1][3][4]
What is the biggest wiring mistake to look for?[1]
Loose, undersized, or heat-damaged DC cabling is a common cause of ripple, shutdowns, and unstable inverter behavior.[1]
When should I replace the inverter instead of repairing the wiring?[1][3][4]
Replace it only after the grid, battery, cabling, insulation, arc, and communication checks all pass and the same fault still returns.[1][3][4]
Next step
If the inverter itself checks out, move from troubleshooting to sizing. Use the calculator to test whether the real limitation is battery capacity, array output, or load demand, then compare the result with the Solar Inverter Sizing Guide.[1][4]
If the fault started on the DC chain instead of the inverter, cross-check the Solar Charge Controller Troubleshooting guide as well.[1][3]
