
Solar charge controllers usually fail in repeatable ways, and many of those symptoms come from the battery, wiring, or settings rather than a dead controller.[1][2]
If the controller looks powered but the system is not charging, start with the battery bank, then the PV input, then the wiring and fuse path, and only then move to settings or replacement.[1][2]
Affiliate disclosure: AESV is reader-supported. If you buy through links on this page, we may earn a commission at no extra cost to you. As an Amazon Associate, AESV earns from qualifying purchases.
Why charge controllers stop charging
A controller can stop charging because the battery is already full, the battery is not connected correctly, the battery profile is wrong, the PV voltage is missing or reversed, the array is undersized, the DC load is too high, the battery cable is dropping voltage, or temperature compensation is set incorrectly.[1][2]
Brand behavior matters. Renogy’s guide points readers to the panel specification sheet and says a PV reading should be within roughly 10% of Vmp, while Victron’s manual warns that some reverse-PV faults show no visible error at all.[1][2]
That is why the same display state or LED pattern should never be interpreted in isolation from a meter reading and the controller manual.[1][2][3]
6-step diagnostic flowchart
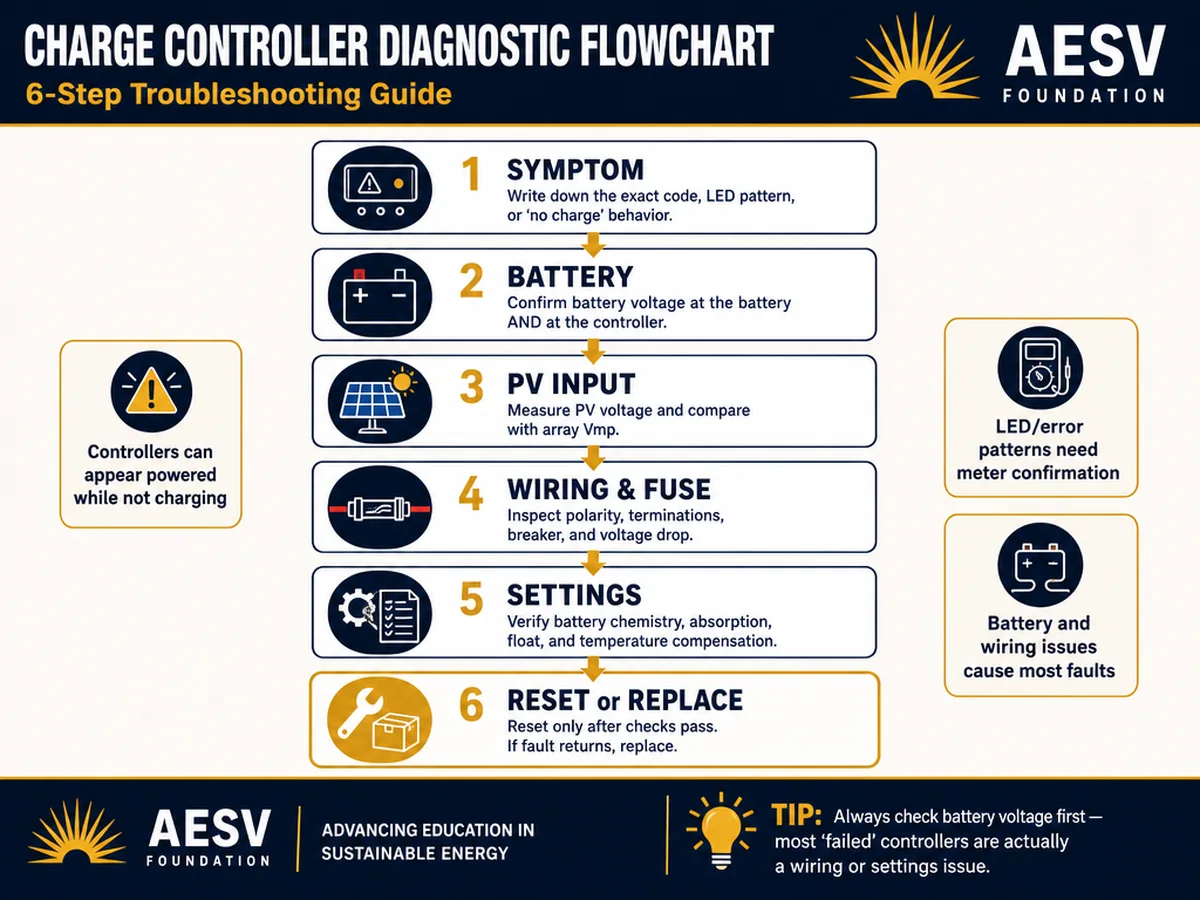
- Symptom: write down the exact code, LED pattern, app warning, or “no charge” behavior before you touch anything.[1][2][3]
- Battery: confirm battery-bank voltage at the battery and at the controller, and make sure the battery is actually connected.[1][2]
- PV: measure PV voltage at the controller and compare it with the array’s operating voltage or Vmp.[1][2]
- Wiring/fuse: inspect polarity, cable terminations, breaker or fuse condition, and cable voltage drop.[1][2]
- Settings/manual: verify battery chemistry, absorption and float settings, max charge current, and temperature compensation against the manual.[2]
- Reset/replace: reset only after the checks above pass; if the fault returns, move to replacement.[1][2][3]
Common error-code and LED-pattern lookup
| Indicator | Likely meaning | First check | Brand note | Next action |
|---|---|---|---|---|
| Battery full / low or zero charge current | The controller may be in a normal float condition rather than failing.[2] | Battery voltage and charge stage.[2] | Victron says zero or near-zero charge current can be normal when the battery is full.[2] | Confirm state of charge before replacing hardware.[2] |
| Battery not connected / battery absent | The controller can appear powered but still refuse to charge.[2] | Battery cables, fuse, breaker, crimp quality, and battery-terminal voltage.[2] | Victron says a disconnected battery can still look connected in the app while charge current stays negligible or zero.[2] | Fix the battery-side connection path first.[2] |
| Reverse battery polarity | The battery is wired backward and the controller may have internal damage.[2] | Battery polarity at the controller terminals.[2] | Victron warns reverse battery polarity can blow the internal fuse and leave the unit faulty.[2] | Correct polarity and replace the controller if it no longer recovers.[2] |
| Battery settings too low | The controller is configured below the battery maker’s recommended charge values.[2] | Battery voltage, absorption voltage, float voltage, and max charge current.[2] | Victron lists settings that are too low, including max charge current set to zero or very low, as a fault cause.[2] | Match the controller profile to the battery chemistry.[2] |
| Reverse PV polarity | The array is connected backward, but some controllers may not show a visible error.[2] | PV terminal polarity and meter reading.[2] | Victron says reverse PV polarity may show no error, only zero charge current, excess heat, and PV voltage near zero.[2] | Isolate the array, correct the leads, and retest.[2] |
| Undercharged battery / slow charging | The array is too small, shaded, or loaded too hard to finish the daily charge cycle.[2] | Float-stage history, PV output, and DC load draw.[2] | Victron lists insufficient solar supply and excessive DC load as undercharge causes.[2] | Check sizing before blaming the controller.[2] |
| Battery cable voltage drop | The controller sees better voltage than the battery actually receives.[2] | Cable length, gauge, hot terminations, and voltage difference at both ends.[2] | Victron treats battery cable voltage drop as a specific cause of undercharging.[2] | Repair the wiring path before further troubleshooting.[2] |
| Temperature compensation wrong | The controller is using the wrong compensation setting for the battery type.[2] | Sensor placement and temperature-compensation value.[2] | Victron says incorrect compensation can undercharge or overcharge batteries, and lithium usually should not use it.[2] | Set the compensation value from the battery documentation.[2] |
How to read the meter before you reset anything
If the PV reading is close to the array’s Vmp and the battery voltage is normal, the controller may be behaving correctly even when the display looks alarming.[1][2]
If the PV reading is negative, Renogy treats that as a reverse-polarity clue; if the PV reading is zero or close to zero and the controller is hot, Victron treats that as a classic reverse-PV sign.[1][2]
If the battery is already full, a low current reading can be normal, so confirm the state of charge before you move to reset or replacement.[2]
Reset the controller only after the wiring checks pass
A reset is useful only after the battery, PV, fuse, polarity, and settings checks are complete.[1][2]
If the same fault returns immediately after a clean reset, the controller is probably not being tripped by a transient problem and should move to the replacement decision.[1][2]
Commercial decision and replacement shortlist
- Renogy Rover 40A MPPT (Bluetooth) — strong replacement pick from the verified list. Check the retailer for current price and availability.
- Renogy Rover 30A MPPT — mid-size replacement. Check the retailer for current price, coupon, and availability.
- Renogy Rover 20A MPPT — budget replacement. Check the retailer for current price and availability.
FAQ
Why is my solar charge controller on but not charging?
Check the battery first, then the PV voltage, then the fuse and polarity path. Victron says a controller can stay powered while showing little or no charge current if the battery is full or disconnected.[2]
Does a reverse PV connection always show an error?
No. Victron says reverse PV polarity may not show a visible error, so you have to rely on the meter reading, heat, and the lack of charging.[2]
How close should PV voltage be to the panel specification?
Renogy’s guide says the measured value should be within roughly 10% of the array’s Vmp, using the panel specification sheet as the reference.[1]
When should I stop resetting the controller?
Stop after the same fault returns immediately. At that point the wiring, battery settings, or controller hardware still need attention.[1][2]
When should I replace the controller instead of repairing the wiring?
Replace it only after the battery, PV, polarity, fuse, wiring, and settings checks pass and the fault keeps returning.[1][2]
Next step
If the controller is healthy but the system still underperforms, move from troubleshooting to sizing. Review the Solar Charge Controller guide, compare replacement options in the Best Solar Charge Controller article, and use the calculator before buying a new unit.[1][2]
