
Building a wind turbine for your home is one of the most rewarding renewable energy projects you can take on. Whether you want to cut your electricity bills, add a backup power source, or just learn how wind energy works hands-on, a DIY wind turbine gives you real energy independence — and it is more achievable than you might think.
This guide covers the full picture: what is involved in building a wind turbine from scratch, what it costs, whether a DIY build or a commercial kit makes more sense for your situation, and the step-by-step process if you decide to build one yourself. We also cover the permits, site requirements, and realistic expectations for how much power a home wind turbine actually produces.
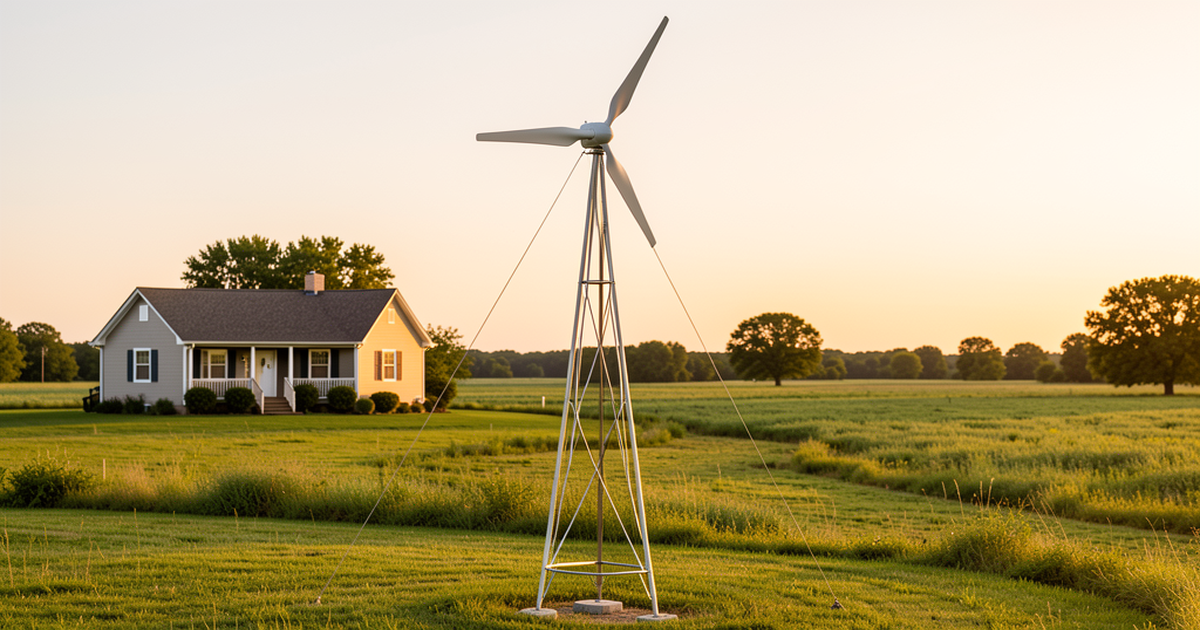
Should You Build or Buy a Wind Turbine?
Before you start cutting metal and wiring generators, it is worth asking whether building from scratch is the right approach. Here is an honest comparison:
| Factor | DIY Build | Commercial Kit / Pre-Built |
|---|---|---|
| Upfront cost | $200 – $3,000 (depending on size and complexity) | $2,000 – $15,000+ (complete system) |
| Power output | 100W – 2kW (typical DIY range) | 1kW – 10kW |
| Skill level required | Moderate to advanced — metalworking, electrical, welding | Basic to moderate — assembly and installation |
| Time to build | Weekends over 1–3 months | 1–3 days for assembly; longer for tower installation |
| Reliability | Depends on your build quality | Factory-tested, warranted |
| Warranty | None | 2 – 10 years |
| Grid-tie capable? | Usually not (standalone / battery charging) | Yes — most commercial systems are grid-tie ready |
| Learning value | Extremely high | Moderate |
Our take: If your primary goal is reducing your electricity bills and you want a reliable, grid-connected system, a commercial wind turbine kit is almost always the better investment. If your goal is learning, experimenting, powering a remote shed or cabin, or you enjoy hands-on building projects, a DIY build is a deeply satisfying project that teaches you real engineering skills.
What You Need to Know Before Starting
1. Check Your Wind Resource
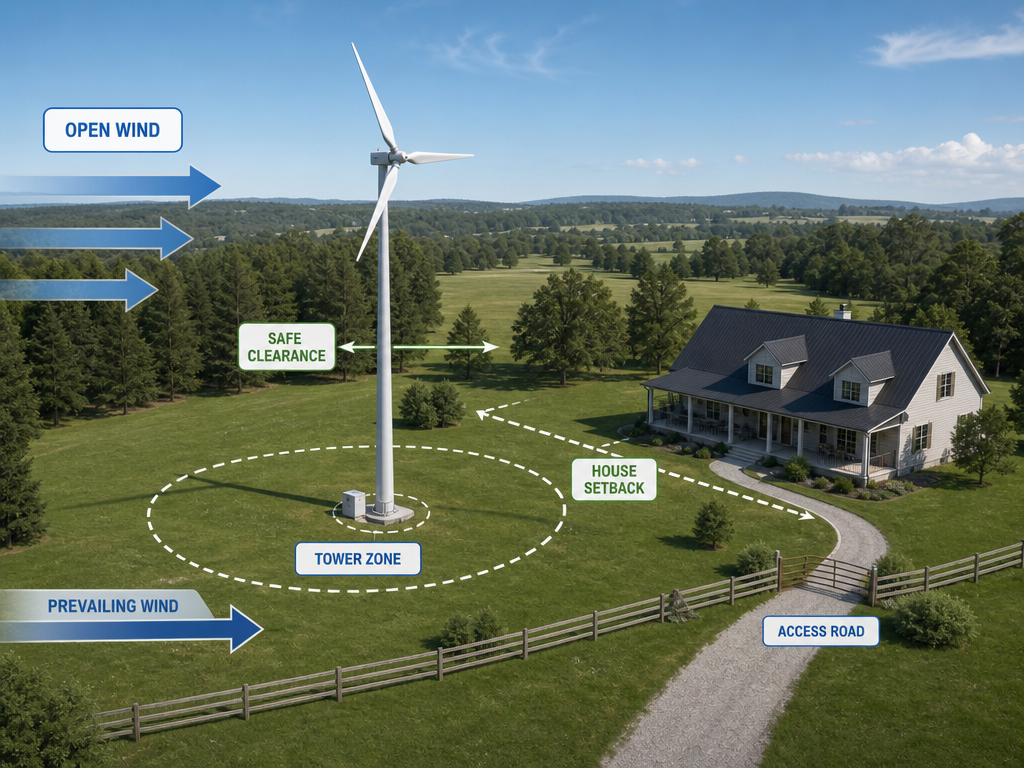
This is the most important step — and the one most DIY builders skip. A wind turbine is only as good as the wind it sits in. You need an annual average wind speed of at least 10 mph (4.5 m/s) for a home turbine to produce meaningful power. At 12+ mph, the economics get much better.
How to check your wind resource:
- Use the DOE Wind Energy Maps at windexchange.energy.gov — enter your address and check the annual average wind speed at 80m height. For small turbines, look at the 30m data.
- Install an anemometer — a wind speed measuring device mounted at the planned turbine height. Record data for at least 3–6 months (ideally a full year) to get accurate local readings. Basic anemometers cost $30–$100; data-logging models run $100–$300.
- Observe local indicators — trees permanently bent by prevailing winds (flagging), consistently windy days, and existing wind installations nearby are good signs.
2. Check Zoning and Permits
Before building anything, contact your local building department and ask about:
- Height restrictions: Many areas limit structures to 35 feet without a special permit. Wind turbine towers are typically 60–120 feet for good performance.
- Setback requirements: Some jurisdictions require the turbine to be set back from property lines by a distance equal to the tower height plus blade radius.
- Noise ordinances: Small turbines produce 35–50 dB at rated speed — comparable to a quiet conversation. Check local limits.
- HOA rules: If you have a homeowners association, check the covenants before investing any money.
- Electrical permits: Grid-tied systems always require electrical permits and inspections. Off-grid battery systems may or may not, depending on your jurisdiction.
Tip: Talk to your neighbors early. Wind turbines are visible, and height and noise concerns are the most common source of complaints. A friendly conversation before installation prevents headaches later.
3. Understand What a Wind Turbine Actually Produces
Manufacturers rate turbines at a specific wind speed (usually 28 mph / 12.5 m/s), which you will rarely see. Real-world output is typically 25–40% of the rated capacity. A turbine rated at 1 kW will realistically produce 250–400 watts on average over a year in a decent wind location.
| Turbine Rating | Realistic Avg Output | Monthly Energy (est.) | What It Can Power |
|---|---|---|---|
| 400W | 100 – 160W | 72 – 115 kWh | Lights, phone/laptop charging, small appliances |
| 1 kW | 250 – 400W | 180 – 290 kWh | Above + refrigerator, TV, internet router |
| 2 kW | 500 – 800W | 360 – 576 kWh | Above + some heating/cooling loads |
| 5 kW | 1.25 – 2 kW | 900 – 1,440 kWh | Significant portion of average home usage |
| 10 kW | 2.5 – 4 kW | 1,800 – 2,880 kWh | Most or all of average home electricity |
Note: These estimates assume average wind speeds of 10–12 mph and a well-sited turbine on an adequate tower. Your actual results will vary based on location, tower height, and turbine quality.
Option A: Building a Wind Turbine from Scratch
If you have decided to build your own turbine, here is the realistic process. A typical DIY wind turbine project produces 400W–2kW and costs $200–$3,000 depending on size, materials, and whether you fabricate or source components.
Components You Need
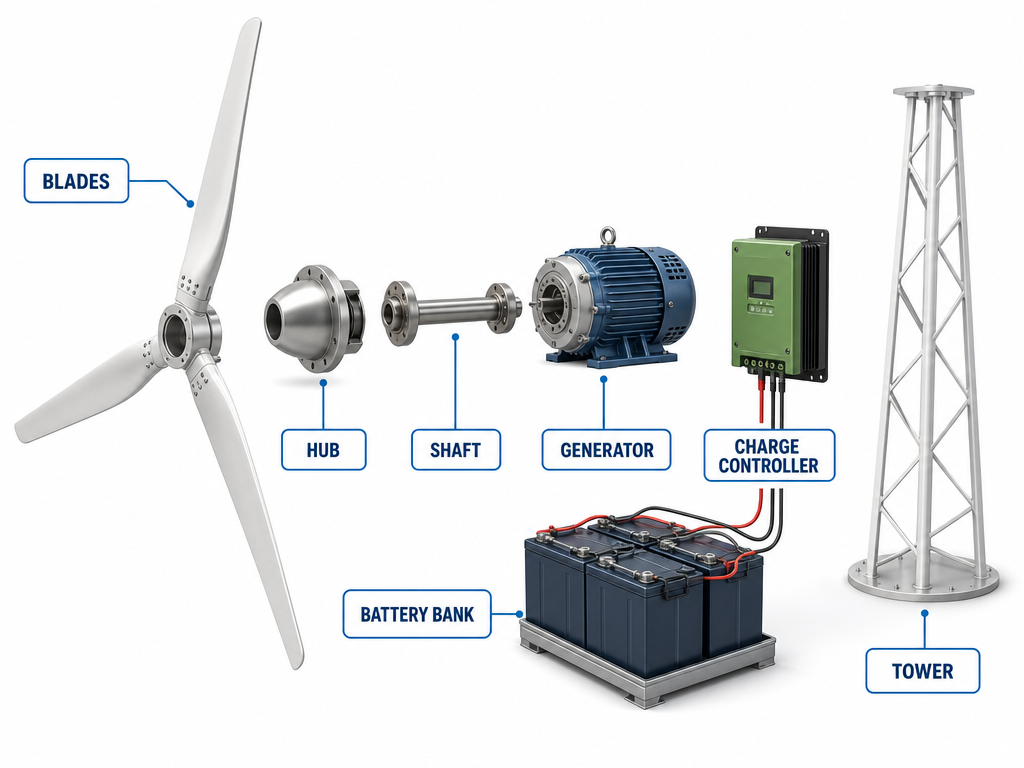
- Blades: The most critical component. Options include carved wood, PVC pipe, fiberglass, or 3D-printed blades. PVC pipe blades (cut from 6–8 inch diameter PVC pipe) are the easiest for beginners. Each blade needs to be balanced and shaped with the correct airfoil profile for efficient lift.
- Hub: Connects the blades to the shaft. Can be fabricated from steel plate, a vehicle brake rotor, or a heavy-duty flange. Must be precisely drilled to mount blades at equal angles (typically 120° apart for 3 blades).
- Generator (alternator): Converts rotational energy into electricity. Options include a permanent magnet alternator (PMA), a repurposed vehicle alternator, or a stepper motor for very small turbines. PMAs are the best choice for efficiency and low-RPM performance.
- Tail vane (furling tail): Keeps the turbine facing into the wind. Also serves as a safety mechanism — in very high winds, the tail folds the rotor out of the wind to prevent damage. Fabricated from sheet metal or plywood.
- Tower: Gets the turbine into clean, undisturbed wind. Options range from a tilt-up steel pipe tower (most common for DIY) to a guyed lattice tower. Height matters enormously — even an extra 20 feet of tower height can increase energy production by 25–30%.
- Charge controller: Regulates the electrical output to prevent overcharging batteries. Essential for any battery-based system. Choose one rated for your turbine’s maximum output.
- Battery bank: Stores the energy for use when the wind is not blowing. Deep-cycle lead-acid batteries are the most affordable option; lithium iron phosphate (LiFePO4) batteries cost more but last 3–5× longer.
- Inverter (if needed): Converts the battery’s DC power to AC power for standard household appliances. Choose a pure sine wave inverter for sensitive electronics.
- Wiring and disconnects: Appropriately sized wire from the turbine to the batteries (heavy gauge for low-voltage DC runs), plus a manual disconnect switch for safety during maintenance.
Build Process Overview
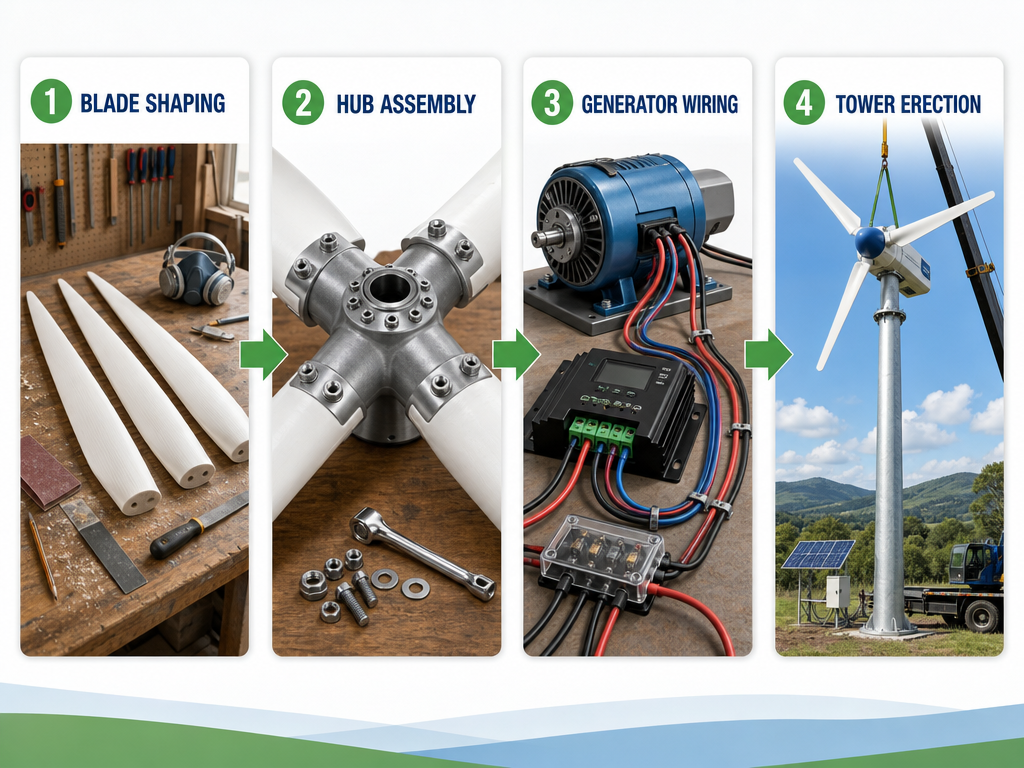
Here is the high-level sequence. Each step involves specific skills and tools — we recommend watching video tutorials for each phase before starting.
Step 1: Build the Blades
Cut three identical blades from PVC pipe (for a beginner build) or carve them from wood (for better performance). Each blade must have the same weight, length, and pitch angle. Unbalanced blades cause vibration that destroys bearings and towers. Sand the leading edge smooth and balance each blade by weight — they should be within a few grams of each other.
Step 2: Build the Hub and Alternator Assembly
Mount the blades to the hub at equal spacing (120° apart for 3 blades). Attach the hub to the alternator shaft. If you are building a permanent magnet alternator from scratch, wind copper coils and arrange neodymium magnets on a rotor disc — there are many detailed plans available online. If you are repurposing a vehicle alternator, you will need to modify it for low-RPM operation by replacing the field coil with permanent magnets.
Step 3: Build the Tail and Yaw Assembly
The yaw assembly allows the turbine to turn and face the wind. A pipe-within-a-pipe design works well — the outer pipe is fixed to the tower, the inner pipe holds the turbine and can rotate freely. Attach a tail vane (a flat piece of sheet metal or plywood, roughly 2–3 feet long) to keep the rotor pointed into the wind.
Step 4: Build or Install the Tower
A tilt-up tower made from steel pipe (2–4 inch diameter, schedule 40) is the most common DIY approach. The tower should be at least 30 feet tall — taller is always better. Use guy wires for stability. A tilt-up design allows you to lower the turbine for maintenance without climbing. Concrete the base into the ground with a proper foundation.
Step 5: Wire the Electrical System
Run appropriately sized wire from the turbine down the tower to the charge controller, then to the battery bank and inverter. Use a disconnect switch between the turbine and the charge controller so you can safely shut down the system for maintenance. Size your wire for the distance — long DC runs need heavy gauge wire to minimize voltage drop.
Step 6: Test and Commission
Before raising the tower, bench-test the alternator by spinning it with a drill and measuring voltage output with a multimeter. Once installed, monitor the system closely for the first few weeks — check for vibration, unusual noises, and proper electrical output. Log your energy production to establish a baseline.
Estimated DIY Build Costs
| Component | Budget Build (400W) | Mid-Range (1 kW) | Notes |
|---|---|---|---|
| Blades (PVC or wood) | $20 – $50 | $50 – $150 | PVC is cheapest; carved wood performs better |
| Hub and hardware | $30 – $80 | $80 – $200 | Steel plate, bolts, flanges |
| Alternator/generator | $50 – $200 | $200 – $800 | Repurposed alternator is cheapest; PMA is best |
| Tail vane and yaw | $20 – $50 | $50 – $150 | Sheet metal, pipe fittings |
| Tower (30 ft tilt-up) | $200 – $500 | $500 – $1,500 | Steel pipe, guy wires, concrete, hinges |
| Charge controller | $30 – $80 | $80 – $250 | Match to turbine voltage and current |
| Battery bank | $100 – $300 | $300 – $1,000 | Lead-acid cheapest; LiFePO4 lasts longer |
| Inverter | $50 – $150 | $150 – $400 | Pure sine wave for sensitive electronics |
| Wiring, disconnects, misc | $50 – $100 | $100 – $300 | Heavy gauge wire, breakers, switches |
| Total | $550 – $1,500 | $1,500 – $4,750 |
Option B: Commercial Wind Turbine Kits
If building from scratch is not your thing — or you want a grid-connected, warranty-backed system — a commercial wind turbine kit is the practical choice. Here is what to look for:
What to Look for in a Wind Turbine Kit
- Rated power vs. real-world output: Ask for the power curve chart, not just the rated wattage. A turbine rated at 5 kW will realistically average 1.25–2 kW in a decent wind zone.
- Cut-in speed: The minimum wind speed needed to start generating power. Lower is better — look for cut-in speeds of 6–8 mph (2.5–3.5 m/s).
- Survival wind speed: The maximum wind speed the turbine can withstand without damage. Look for at least 100 mph (45 m/s) for most U.S. locations.
- Tower compatibility: Some kits include a tower; others require you to source one separately. The tower is often the most expensive single component.
- Warranty: Look for at least 5 years on the turbine and 2 years on the electronics. Some manufacturers offer 10-year warranties.
- Grid-tie certification: If you want to connect to the grid and earn net metering credits, the inverter must be UL 1741 listed and your utility must approve the interconnection.
Estimated Costs for Commercial Systems
Note: After the 30% federal Residential Clean Energy Credit, your net cost drops significantly. Many states also offer additional incentives. Check the DSIRE database for programs in your area.
DIY vs. Kit: Bottom Line
A DIY build is a fantastic learning project and can produce real power for a remote cabin, workshop, or battery-charging application at a fraction of the cost of a commercial system. But if you want a reliable, grid-connected system that will pay for itself over time, a commercial kit with professional installation is the safer bet. The warranty, grid-tie capability, and proven engineering make the higher upfront cost worthwhile for most homeowners.
Tower Options: This Matters More Than You Think
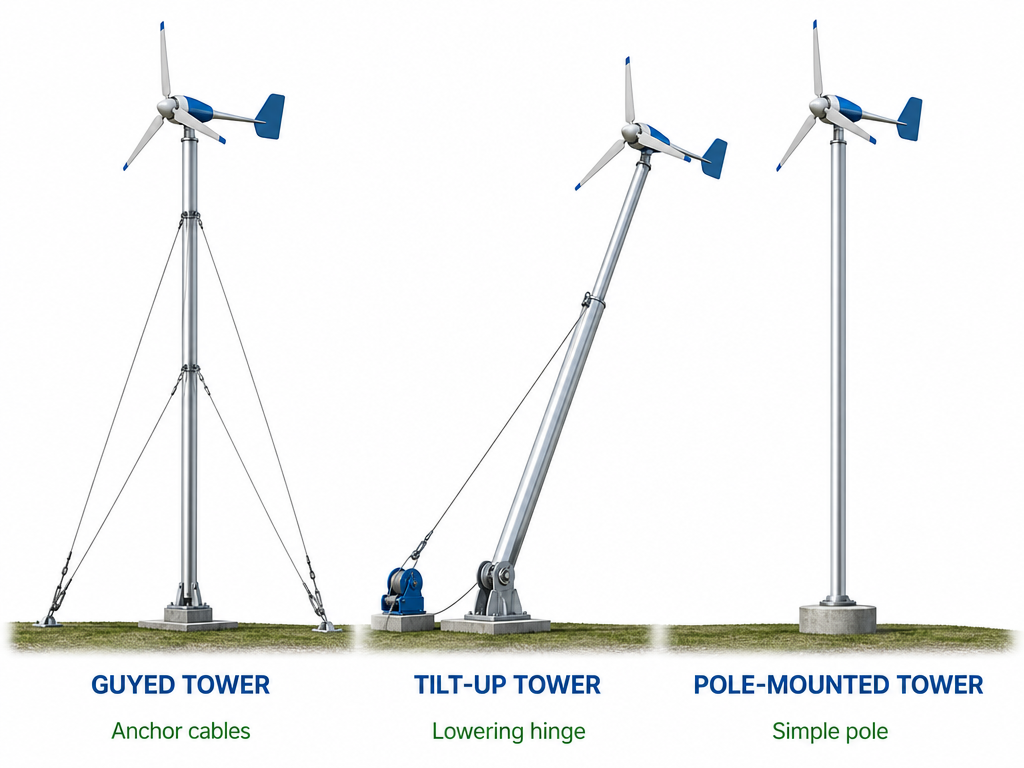
The tower is the most underrated component of a wind turbine system. A turbine on a short tower in turbulent air can produce 50–75% less energy than the same turbine on a proper tower in clean air. Here are the main options:
| Tower Type | Typical Height | Cost Range | Pros | Cons |
|---|---|---|---|---|
| Tilt-up pipe | 30 – 60 ft | $500 – $3,000 | Easy maintenance (lower from ground), DIY-friendly | Limited height, needs guy wires |
| Guyed lattice | 60 – 120 ft | $3,000 – $10,000 | Tallest option, strong, proven design | Needs climbing for maintenance, large footprint |
| Free-standing monopole | 30 – 80 ft | $5,000 – $15,000 | Clean look, no guy wires, small footprint | Expensive, heavy foundation needed |
| Trees (not recommended) | Varies | $0 | Free | Unsafe, turbulence, vibration damage to tree |
Rule of thumb: Your turbine should be at least 30 feet above any obstacle within 300 feet. If your trees are 40 feet tall, your turbine hub should be at least 70 feet up. Shorter towers put the turbine in turbulent, low-speed air and dramatically reduce output.
Real-World Tips from DIY Builders
- Start small: Build a 400W–1kW turbine first to learn the fundamentals before investing in a larger system. A small turbine teaches you blade balancing, electrical wiring, and tower construction at low cost.
- Balance your blades obsessively: Even a few grams of imbalance at the blade tip causes vibration that destroys bearings and can shake a tower apart. Spin-test your blades and add small weights until they are perfectly balanced.
- Oversize your wire: Voltage drop over long DC runs is the most common mistake in DIY wind systems. Use wire one gauge heavier than you think you need.
- Include a manual brake: Every wind turbine needs a way to stop — either a physical brake or a shorting switch that creates electromagnetic braking. Do not skip this; an uncontrolled turbine in a storm is dangerous.
- Use marine-grade components: Wind turbines live in harsh conditions. Stainless steel hardware, marine-grade wire, and UV-resistant materials last far longer than hardware-store alternatives.
- Join a community: Online forums like Field Lines and other wind energy communities have decades of accumulated DIY knowledge. Before building, read existing build logs — they will save you from common mistakes.
- Plan for maintenance access: Design your tower so you can lower the turbine for maintenance without needing a crane or climbing. A tilt-up tower with a winch is the most practical DIY solution.
Frequently Asked Questions
How much does it cost to build a wind turbine?
A basic DIY wind turbine (400W) costs $500–$1,500 in materials. A mid-range build (1 kW) runs $1,500–$4,750. These costs exclude the tower foundation and any professional electrical work. A complete commercial system (turbine + tower + installation) ranges from $5,000 for a 1 kW system to $55,000 for a 10 kW system, before the 30% federal tax credit.
How long does it take to build a wind turbine?
A simple DIY turbine can be built in 2–4 weekends if you have basic metalworking and electrical skills. A more complex build (fabricated blades, custom alternator, larger tower) may take 2–3 months of weekend work. Commercial kits can be assembled in 1–3 days, but tower installation may take an additional 1–2 days and may require professional help or a crane.
Can I connect a DIY wind turbine to the grid?
Technically yes, but practically it is very difficult. Grid-tied systems require a UL 1741 certified inverter, utility interconnection approval, electrical permits, and inspections. Most DIY turbines operate as standalone battery-charging systems. If you want grid-tie capability, a commercial system is the better path.
How much power can a home wind turbine produce?
Realistically, a small residential turbine (1–10 kW rated) produces 25–40% of its rated capacity averaged over a year. A 5 kW turbine in a decent wind zone (10–12 mph average) produces roughly 900–1,440 kWh per month — enough to cover a significant portion of average home electricity use (about 900 kWh/month in the U.S.). Your results depend heavily on your wind resource and tower height.
What is the best DIY wind turbine design for beginners?
A three-blade, horizontal-axis turbine with PVC pipe blades and a repurposed vehicle alternator is the simplest design to build. It produces 200–500 watts in good wind and costs under $500. This is enough to charge batteries for a small cabin, workshop, or emergency backup system. Once you have mastered this build, you can scale up to a larger turbine with a purpose-built permanent magnet alternator.
Are there tax credits for wind turbines?
Yes. The federal Residential Clean Energy Credit covers 30% of the total installed cost of a small wind energy system through 2032, including the turbine, tower, inverter, and installation labor. Some states offer additional incentives. Note that DIY-built systems may not qualify for the federal credit unless they are grid-tied and meet code requirements — check with a tax professional. Commercially manufactured and professionally installed systems almost always qualify.
How long does a home wind turbine last?
A well-built wind turbine lasts 20–25 years. Commercial turbines typically come with 5–10 year warranties. DIY turbines depend entirely on your build quality — using quality materials, balancing blades properly, and performing regular maintenance can extend the life significantly. Budget for blade bearing replacement and occasional electrical component service every 5–10 years.
Key Takeaways
- Check your wind resource first — you need at least 10 mph average wind speed. Use the DOE Wind Energy Maps and consider installing an anemometer for local data.
- DIY builds cost $500–$4,750 and produce 400W–2kW — great for learning, remote cabins, and battery charging.
- Commercial systems cost $5,000–$55,000 installed but offer grid-tie capability, warranties, and higher output — better for reducing electricity bills.
- The 30% federal tax credit applies to commercial wind systems through 2032.
- Tower height matters more than turbine size — a small turbine on a tall tower outperforms a big turbine on a short tower.
- Balance your blades obsessively — vibration from unbalanced blades destroys bearings and towers.
- Always include a braking mechanism — an uncontrolled turbine in a storm is dangerous.
- Check zoning and permits before building — height restrictions and noise ordinances are the most common barriers.
- Talk to your neighbors early — prevention is easier than conflict resolution.
- For a complete overview of wind energy, see our Wind Turbines Guide. For a head-to-head comparison with solar, see Wind vs Solar.
Last updated: July 2026. Pricing figures are estimates based on industry data and DIY community reports as of mid-2026. Images © AESV.
